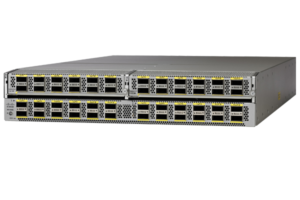
Continuing my look at Cisco’s Data Center Network Manager (DCNM) software, I had to swap out a faulty spine switch recently, and got a chance to find out whether I could use DCNM to make the RMA process a little less painful than it would normally be.

Using DCNM for RMA
If I had a dream, albeit a rather sad one, it would be to be able to swap out a hardware component in my network quickly and efficiently, and not have to mess around.
DCNM has all the elements to make this feasible. Given a device serial number, I’ve already confirmed that DCNM can automatically deploy the correct firmware version and base configuration when deploying a new fabric, so there’s no reason it couldn’t be used to do the same thing for a replacement switch, but this time deploying the complete, production configuration in one step. Happily I already have the configuration for the spine switch I’m replacing, because DCNM takes frequent backups. I also have the appropriate firmware loaded to DCNM’s software repository because I used it to build the fabric in the first place. So how do I approach the RMA?
Telling DCNM About The New Hardware
Once the replacement switch was received at the data center, I was sent the serial number. At that point, I went to the DCNM POAP configuration and added a new device. I provided:
- Serial number
- Firmware version
- The device configuration that I downloaded from the configuration repository
That’s it. The old device was unracked, the new one was racked in its place and the cables/fibers connected as before, then it was powered up. At that point, POAP did its thing and installed the firmware, staged the configuration, and rebooted the switch. Ten minutes later the switch was fully rebooted and had taken over the old switch’s role in the fabric as a spine switch. It was that easy.
Tidying Up
After bringing the new switch up, the only remaining tasks were to transfer the DCNM (management) license from the old (faulty) switch to the new switch, and to delete the old switch from the inventory. It took a matter of minutes to un-allocate the license from the old switch and allocate it to the new one, and another few seconds to remove the old switch from inventory. Really a very painless process.
Suggestions for Improvement
Wouldn’t it be cool if this wasn’t a manual process? If I’m doing a like-for-like swap (which with an RMA I really should be), it would be really nice to have an RMA feature which works like this:
- Click on the
Swap Out Device (RMA)
menu option - Select the device that is being removed
- Enter the serial number of the device that’s replacing it
- Offer a checkbox option to remove the old device from DCNM inventory once the new device is online
- Offer a checkbox option to move the DCNM license from the old device to the new device once the new device is online
At this point, DCNM would wait until a device with the new serial number showed up on the network. When it saw the appropriate DHCP requests, it would deliver the firmware and configuration matching what was on the device that was being removed, and once the new device booted up and was active, the old device would be removed from inventory. Wouldn’t that be neat?
Even without the perfect process in place, DCNM nonetheless turned an otherwise tedious process into one requiring minimal input and monitoring.

Leave a Reply