
Not content with having dug the Northbound Networks Zodiac FX out of a pile of overlooked technology in my office, I thought that the poor thing desperately needed to have a case to sit in. When I originally received the switch, I did not have a 3D printer and had no idea what it would take to make a case; now though, I do have a 3D printer … and no idea what it would take to make a case. Sounds like a plan to me!
Measuring the Zodiac FX
The most important tool I bought to go with my 3D printer (a Creality CR6-SE) was some digital calipers. I discovered early on how important it was to ensure that if I was going to screw up, I should be able to screw up accurately.
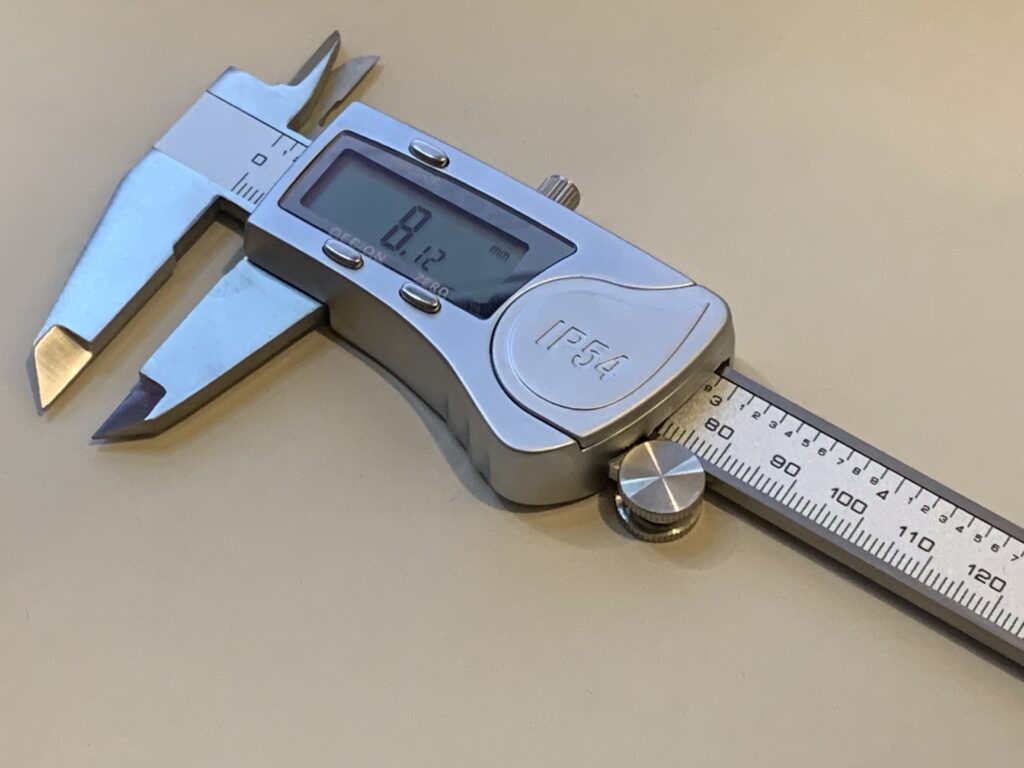
These calipers are made by RexBeti, and if you’ve never heard of that company that’s ok, because before I purchased this I hadn’t either. The calipers claim to be accurate to 0.01mm, but I don’t have any way to validate that claim, so let’s just assume that they are. I do know that it beats using a ruler. A few minutes of careful mismeasurement later and I had a page of diagrams showing all the critical dimensions of the switch board from which I could use to create sketches in Fusion360 and hopefully generate some kind of 3D model.
Modeling a Case
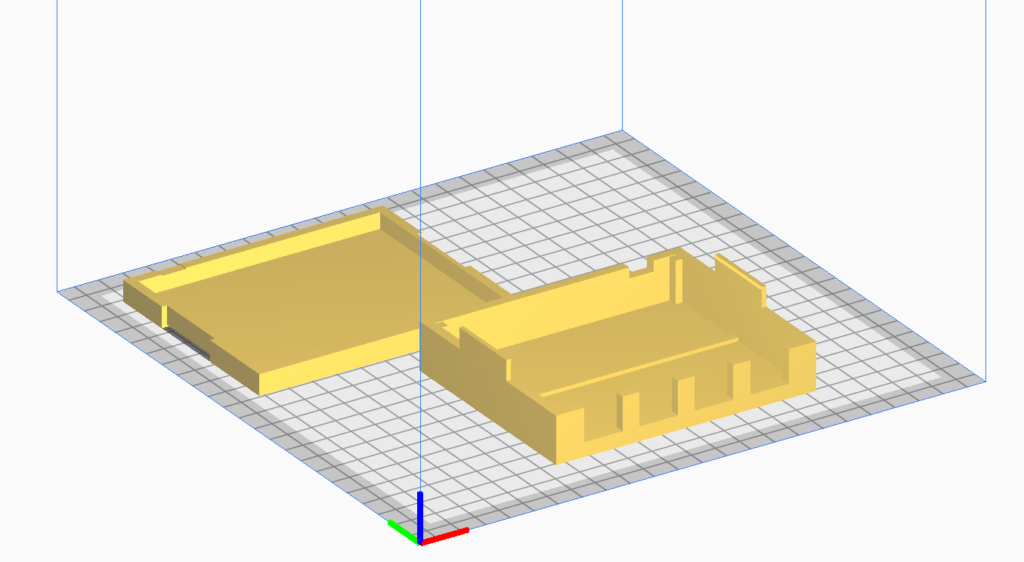
In the end I went with a pretty simple design; purely functional, no chamfering or filleting of the edges, and a simple clip system on the side to close the case. The base and lid are shown here in Cura (preparing to be printed):
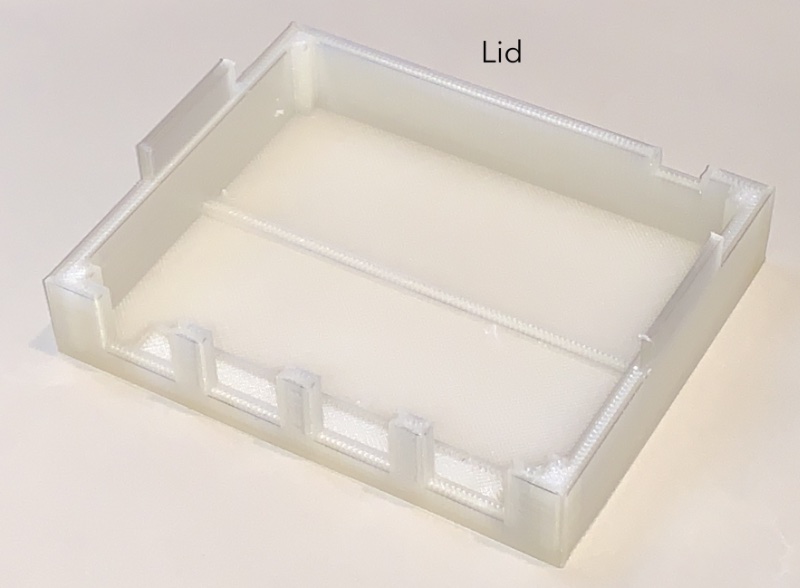
Holding the board in place without screws was achieved in part by making the base a close fit to the size of the board and designing it so that the board would sit inside it, then using a combination of rigid components on the lid which would press down on the board to hold in in place. There are small pieces in each corner which sit against the board, and there is also a bar running across the top the ethernet ports.
Printing the Zodiac FX Case
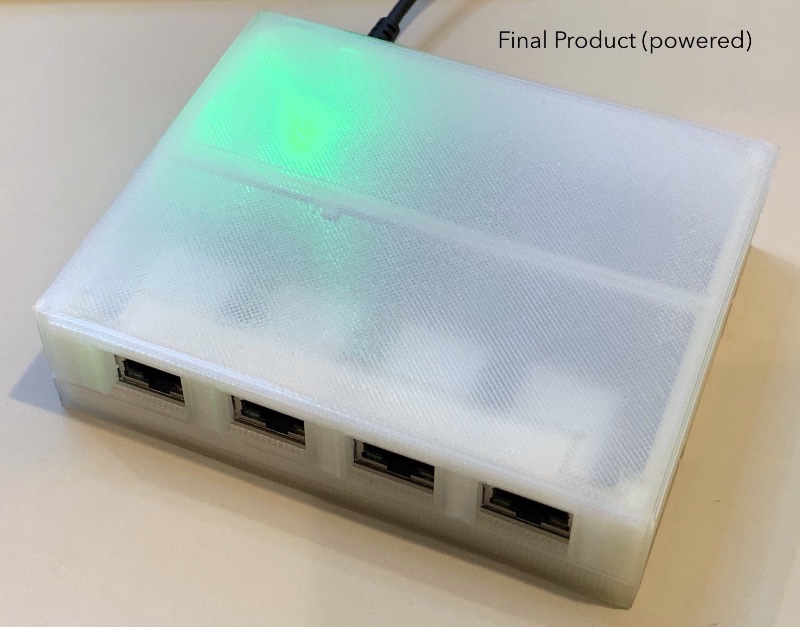
The Zodiac FX has a power LED, but it’s on the board at the back left hand side which is not ideal unless you fancy making some kind of light pipe to bring that light to the front of the switch, which I do not. Therefore I decided to print the case in crystal PLA which is translucent enough to allow the green LED to diffuse through the case and be visible from the outside. A regular, opaque PLA would not have done this and would not be as pretty. This decision also meant that I printed with 100% infill, because seeing the cubic infill pattern at 40% infill is cute, but not great. The results were pretty acceptable, all things considered:

Assembly
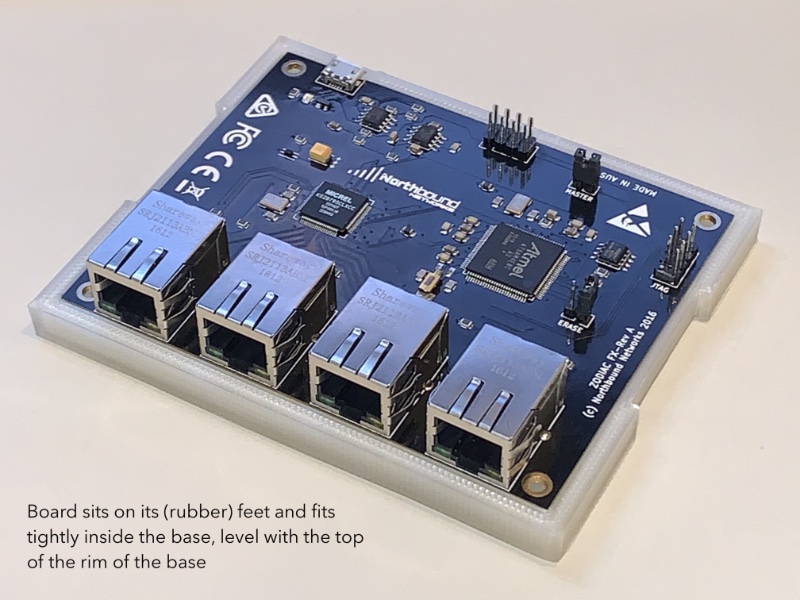
I then added the board to the base, and ensured that it fit correctly.
Then I added the lid, clicked the clips into place, and plugged in the power!
Not bad for a quick job. The tolerances are quite tight, so may need tweaking depending on the materials and printing environment, but this worked well for me and my set up (Creality CR6-SE, IIID+ Crystal PLA+ filament, 0.2mm layer height, 80mm/s fill, 40mm/s walls, 200degC hot end, 65degC base, no supports). I got a very small bit of elephant’s foot in one corner of the base, but it wasn’t significant enough to consider reprinting.
Thingiverse
I know that there are literally thousands of you who have been waiting for this, so of course my Zodiac FX Case is on Thingiverse. I’ve posted the STL files there as well as a STEP file for those who really hate themselves. Believe it or not, there’s another case design on Thingiverse from 2016, as it turns out; so now there are two.
Ok, that was fun. Does that mean I have to do something with it now?

amazing !!
AS someone who thought that devicewas cool before, and who just setup my first Ender3 printer yesterday, this feels like a nice mash up of interests.